I scanned the car in preparation for sale and found that a new fault code was being flagged:
1 Fault Found:
01134 - Alarm Horn (H12)
            000 - -
             Freeze Frame:
                    Fault Status: 01100000
                    Fault Priority: 4
                    Fault Frequency: 1
                    Reset counter: 111
                    Mileage: 163680 km
                    Time Indication: 0
                    Date: 2024.10.18
                    Time: 11:15:12

             Freeze Frame:
                        Term 15 On
                    Voltage: 11.85 V
                        ON
                        ON
                        Term 50 Off
                        OFF
                        OFF
I investigated possible causes and found that a common problem affecting all VAG cars is that the backup battery in the alarm siren (called horn in the code above) gets old/wears out causing a failure.
Backup battery
The backup battery is there so that the alarm siren will still function if the main battery is depleted or disconnected. In fact, the siren will also sound if it is removed from the car also.
I have previously successfully replaced the backup battery on a Porsche alarm siren, so looked into doing this on the Golf.
In this guide, I cover:
- How to test the siren
- How to remove it
- How to open it
- How to replace the whole siren
- How to replace the battery
- Opening the siren
- Accessing the battery
- Replacing the battery
Testing
I found that the alarm siren was still working when connected and with the main battery in good condition.
I tested this by having the windows open and locking the car with the remote. After allowing for the setting delay, I waved my arm through the open window triggering the alarm and siren.
Measuring Blocks
I also found out that VCDS/Vagcom is able to report on measuring blocks specific to the alarm siren. Block 126 shows:
- Siren Battery condition and
- Siren Low Voltage.
I have not managed to find further description of these measures, but mine showed Siren Battery Condition as “Defect” and Siren Low Voltage as “OK”

I decided to inspect the siren to see if replacing the battery was viable. This was based partly on advice from speaking to a VW specialist repairer that they had found that some new genuine VW alarm sirens they had fitted had failed after only a year.
Removing the Alarm Siren
Tools needed:
- VCDS/Vagcom or a tool capable of disabling the alarm*
- Jack, jackstand, alloy wheel key, wheel bolt cover key, wheel bolt socket (17mm)
- Torque wrench (120 Nm/88 ft lb when re-torquing wheel bolts)
- Torx/star T25 wrench (a mini ratcheting type will make things easier/quicker)
- Range of HSS/metal drill bits, say 4-6.5 mm and drill
- Other pry tools, hammer.
- 13 mm spanner / socket
- Pop riveting tool and rivets (2 x 6.2 mm or genuine VW 6.4 mm) with ability to handle 6.2/6.4 mm rivets (I had to buy a two-armed tool as my existing tool would not handle the larger rivets)
- Worklight
* This is needed because if you remove the siren without disabling the alarm, the siren will activate.  I believe it does this even if the car is unlocked/alarm deactivated at the time.

You MAY get away with it if the battery is dead so that the alarm siren cannot go off when unplugged, but I cannot be sure that you will not hit other issues.  You also need some way to test that a refitted siren is OK.
The siren is located in the front driver’s side (right hand drive) wheel arch behind the plastic liner.
Removal involves:
- Jacking and placing on a jack stand for safety
- Removal of the wheel (to improve access)
- Removal of the larger main (top) wheel arch liner – lower front liner can remain in place
- Disabling the alarm
- Removal of a metal container holding the alarm siren
Wheel arch liner
It is a false economy to try to work on the siren by just pulling the liner out a bit rather than removing it completely (I’ve seen this suggested elsewhere).
The main (top) wheel arch liner is relatively simple to remove (it’s worth doing from time to time anyway to clean out dirt and debris which can build up behind them). There are just several Torx T25 screws. Remove these and the covers just pulls out.
Reinstallation is relatively straightforward, but as with any plastic part, screws should only be inserted a couple of turns at the beginning. This allows for alignment and movement of the part (you may also need to loosen screws on the smaller front lower liner to help with this).
Once all screws are in and the liner is correctly in position (there is one tab at the rear bottom edge which slots into a, er…slot in the undertray) the screws can then be tightened.
Removal of a metal container holding the alarm siren
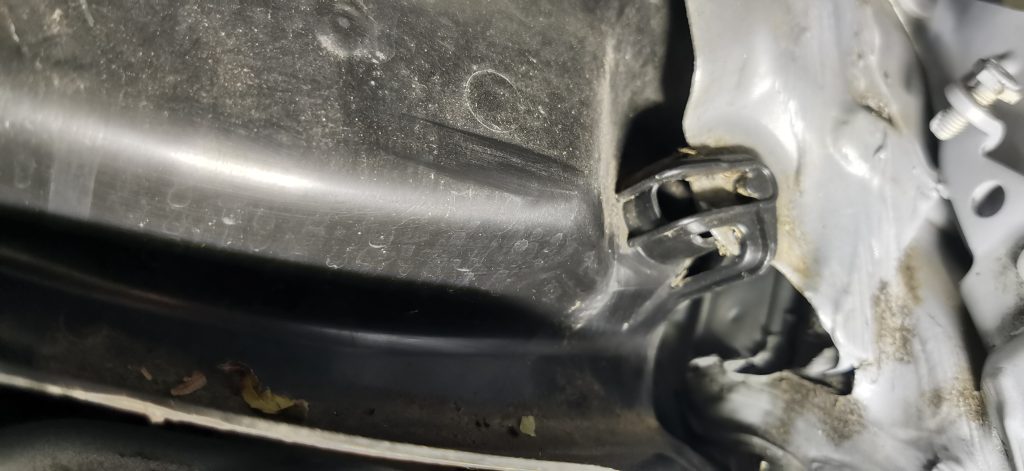
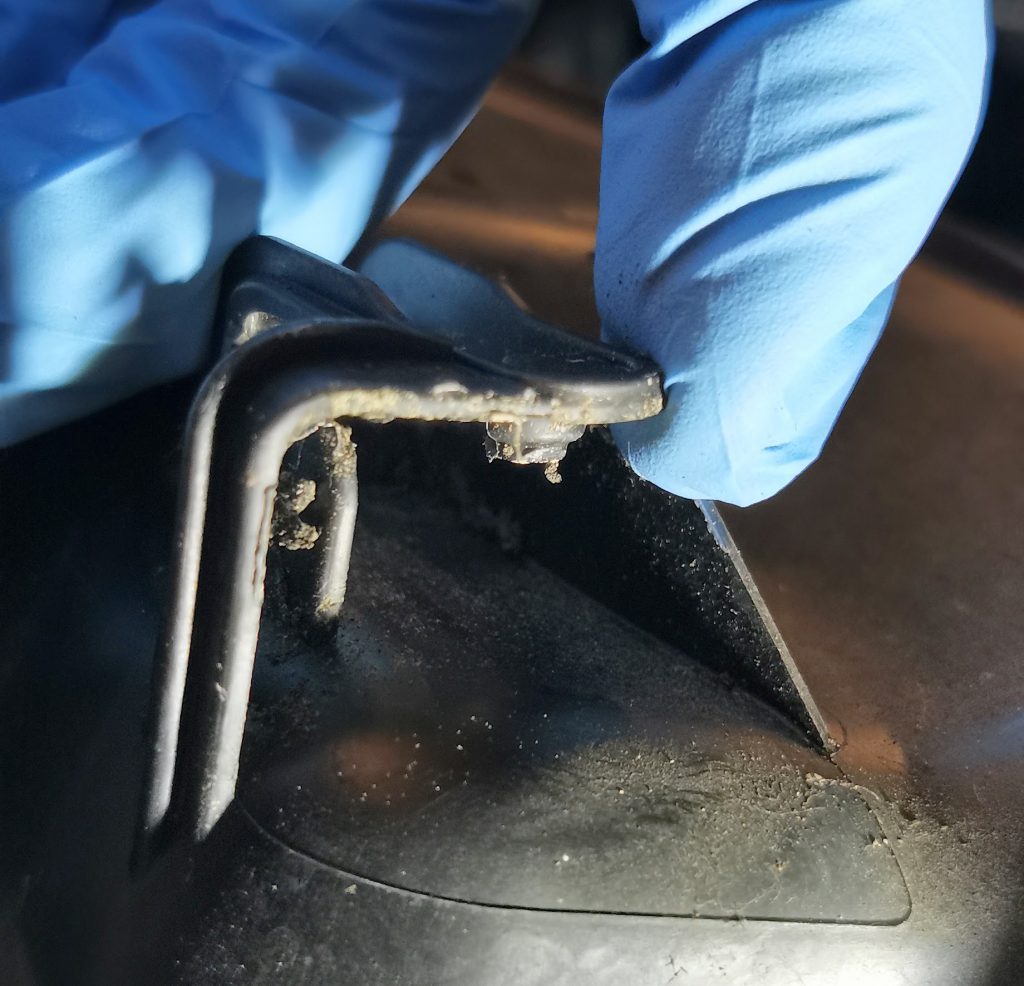
This is the worst part of the job. It is necessary to drill out two rivets holding a metal box within which the siren is bolted. There is also a metal tab covered by a rubber gripping piece. This clips on to the edge of a hole further up into the wheelarch.

The rivets used by VW are 6.4mm diameter. I worked up through drill sizes from 4.5 mm up to 6 mm, but I believe a 6 mm will work.
Unfortunately it’s not as simple as that. The rivets in my case began to spin quite soon after starting drilling. Additional pressure on the drill may help to stop teir rotation and allow the bit to do it’s job.
But it may also be necessary towards the end to use other tools to remove the remainder of the head. I used a small pry bar/claw and a small cold chisel.
Work slowly and with care to avoid damage.
There is one typical VW connector to remove once the rivets are free.
The siren itself is held within this box/cover with one 13 mm nut.
Replacing the Whole Siren
New sirens can be sourced from VW dealers and some third parties. There are also knock-off versions for sale from the usual Chinese sources, but I have no idea whether these will actually work or not.
New sirens are generally slightly cheaper from third parties (at the time of writing, VW price is £232 and they are for sale elsewhere for ~£150).
I was told by a VW specialist that, if buying new, using a dealer is worth considering because failures of new sirens can occur after 12-18 months and if you need to claim on the VW parts warranty, they may be less than helpful if purchased elsewhere.
Used sirens are relatively plentiful. Bear in mind that a used siren will have a used battery and a finite life. Knowing the age of the donor vehicle is worthwhile so that you can get the newest possible, but it is also worth thinking about replacing the battery in a used siren before fitting anyway.
I cannot give a full guide to compatible part numbers. My car has part 1K8951605A. I was told that the latest replacement part for tha if buying new is 1K0951605F (note 1K0 vs 1K8). I’m not sure, but I “think” the 1K8 here referred to a Cobra produced part vs a Bosch part (1K0).
Part numbers B-F “should” work, but I have not tried. The sirens look slightly different and some used a different metal case, but I was able to fit a later siren in my existing case.
Replacing the alarm siren battery
Tools and supplies needed:
- Junior hacksaw (may be possible to use other knife or a standard sized hacksaw – not tried)
- Something like nylon/plastic trim removal tools (flat pointed type) – a wooden picnic knife might suffice. Possibly a flat blade screwdriver (great risk of damaging circuit board – not recommended)
- Soldering iron/solder
- Solder removal method (solder sucker and possibly desoldering braid)
- Wire cutters / snips (small side cutter type)
- Something to close and seal the case afterwards (e.g. epoxy, or adhesive/sealant)
The batteries used in VW alarm sirens vary slightly, but for cars of this period (and the mk5 and more recent as well) are made up of a series of Varta 1.2V cells.
The two most common battery numbers are:
5/V150H and 5/V200H
The “5” refers to the number of cells (i.e. 5×1.2V giving 6V nominal voltage total)
The 150 and 200 refer to the capacity/size of the cells used. The 150 actually contains 5 x 140 mAh cells (i.e. 700 mAh) and the 200 contains 5 x 200 mAh cells (1000 mAh total).
The difference is just how long the siren will remain active if the main battery is disconnected/depleted.
At the time of writing (Oct 2024), it is possible to buy both types with soldering legs already attached from sellers on ebay UK. Ideally you need a single central solder leg/tab at each end (some come with one leg on one end and two on the other). It may be possible to adapt others.
If you cannot source like this, then it may be possible to buy the battery and attach solder legs yourself (either by spot welding or soldering – see generic guides on the ‘Net about how and safety precautions when doing this).
In a pinch, the Varta individual cells are also generally available. Search for “Varta V200H 1.2V”or ” Varta V150H 1.2V”. I believe the V200H cell part number is “VARTA – 55620101501”, but I have not confirmed this.
I do not know which batteries are used in all sirens (there are are several generations and part numbers which all vary depending on if the siren is made by Cobra, Bosch or others).
To be sure, you will need to open the siren before buying a battery. This is necessary anyway because when the batteries fail completely they are well known for leaking contents on to the siren’s circuit board and destroying it – in which case battery replacement is off the table and the siren must be replaced.
Replacing the battery on a visibly undamaged siren is NOT a guarantee of a fix, sadly. Other faults can occur. This happened in my case and I ended up replacing the siren in the end.
Opening the siren
The siren needs to be cut open. This is not too bad a job, but some care is needed.
I have see people describing various ways to do this ranging from using a craft knife to applying heat first.
I cannot claim that what I did is the best way to do it, but it works.
I used a junior hacksaw. The alarm siren body is two halves stuck together and there is a small crevice between the two parts.
It is possible to carefully saw at this point. It is quite quick and easy to do.
This picture shows the business side of the siren once open.
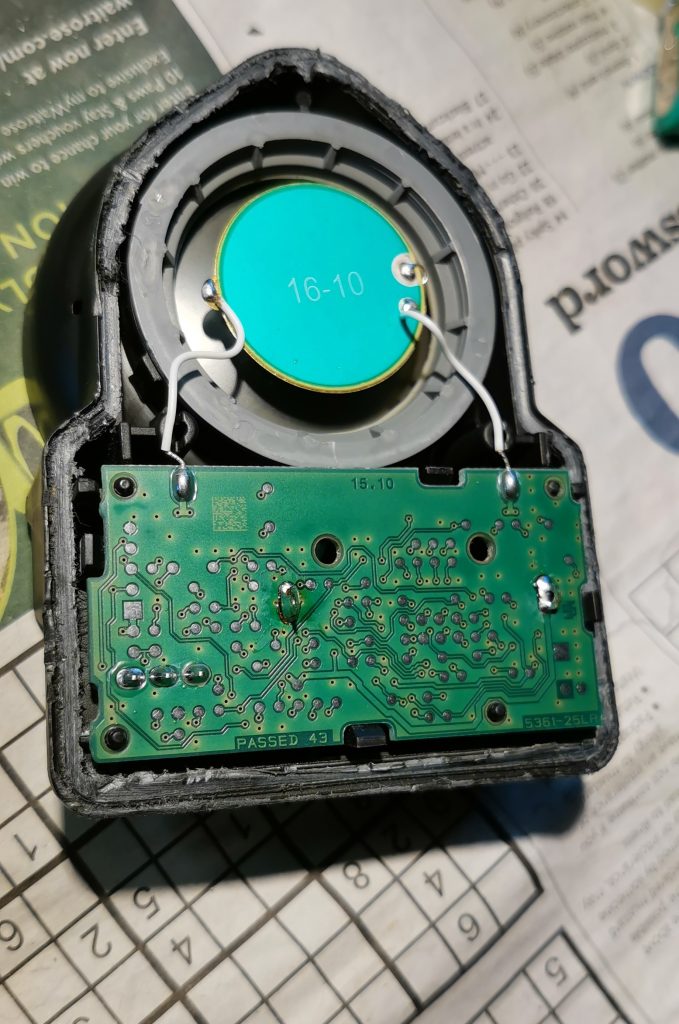
Note where particular care is needed when using a knife or saw to open the siren. It is possible to damage retaining clips for the circuit board or, worse, the board itself if cutting too deep.
Work slowly and a little around each part of the case at a time. Pay attention at the start before cutting to how far your blade is in the crevice and then you will be able to gauge when you are approaching the right depth.
After each pass around the case, try gently prying open. If you work in this way, you’ll likely cut to the point where it is almost open and then the last prying will actually be what opens the case rather than cutting through fully everywhere.
Accessing the battery
The battery is soldered to the circuit board and can only be accessed by removing the board from the case.
N.B. The battery itself is located in a channel in the case (invisible as hidden by the circuit board). So it won’t pop straight out as soon as you release the circuit board.
First, gently release the two wires from the small grooves.

Then use a thin blade trim removal tool or similar to lift around the edge of the board while pushing back the nearest clip at the same time. The picture below shows the location of the clips which hold the board and the pins which locate it. The pins do actually hold it slightly, but release easily by just levering up the edge of the board.
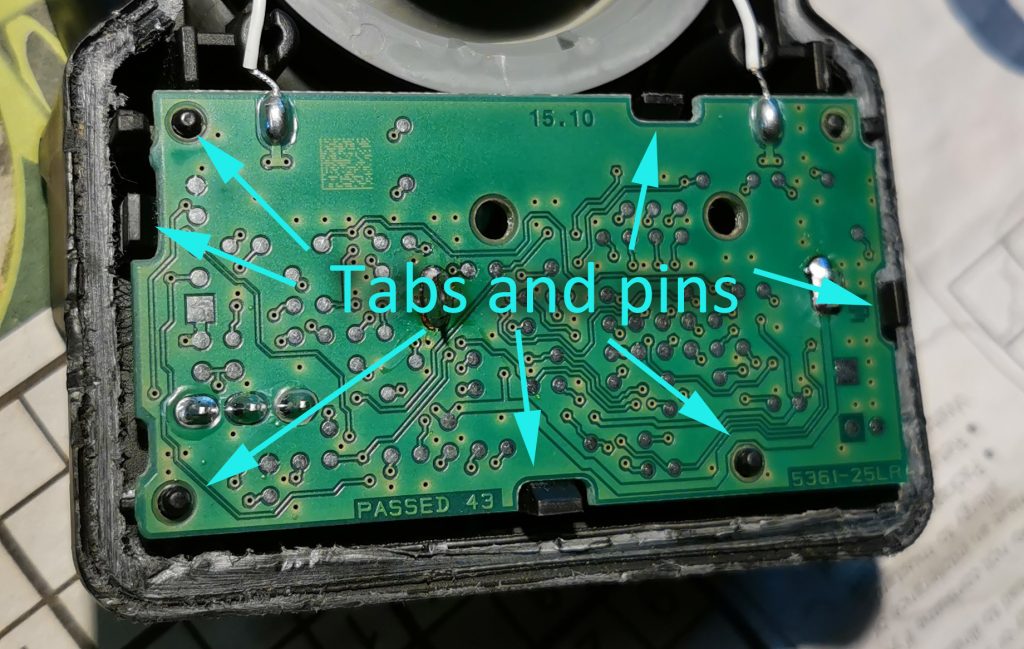
Work around until all clips release and the board is lifted up from the pins slightly. It will still be held in by the battery being held in a channel at this point. In the picture above, some of the clips are already released.
Just gently lever up around the edge to remove. As the battery releases and the board can be lifted, you can fold it back towards the siren taking care of the wires.
You will now be able to see the battery and identify what model you need. The smaller battery will fit in the space for the bigger battery, but it is not ideal as the alignment makes refitting the board and closing the case more difficult. Try to get the correct battery.
Replacing the battery
Assuming your battery has not leaked and damaged the board, you can try replacing the battery.
TAKE A PHOTO OF YOUR EXISTING BATTERY as mounted so that you have a guide as to how close it sits to the board and polarity. Some pictures of my siren before removal of the battery below, but yours may differ.
Desolder the existing battery and remove. Clear holes to allow fitting of new battery.
Insert new battery (check polarity again!) to roughly the position of the old battery and bend legs on reverse of board slightly (don’t bend them enough to touch other components) to locate the battery.
Testing
You may wish to test the siren at this point. The battery will need to have a reasonable voltage when delivered (they are usually over 6V) and there will need to be a connection at the soldering legs just by touchin any remaining solder.
It should then be possible to check if it’s possible to clear the fault and also check measuring block 126.
The battery be soldered either with the circuit board and battery out of the case. I decided however to put the battery back into its location in the case to ensure that everything was correctly aligned and to then solder.
IMPORTANT – note that when you put the board back in, you need to align the three pins on the board which form the connector to which the cable will be plugged in later. These pins go through a slot in the case.
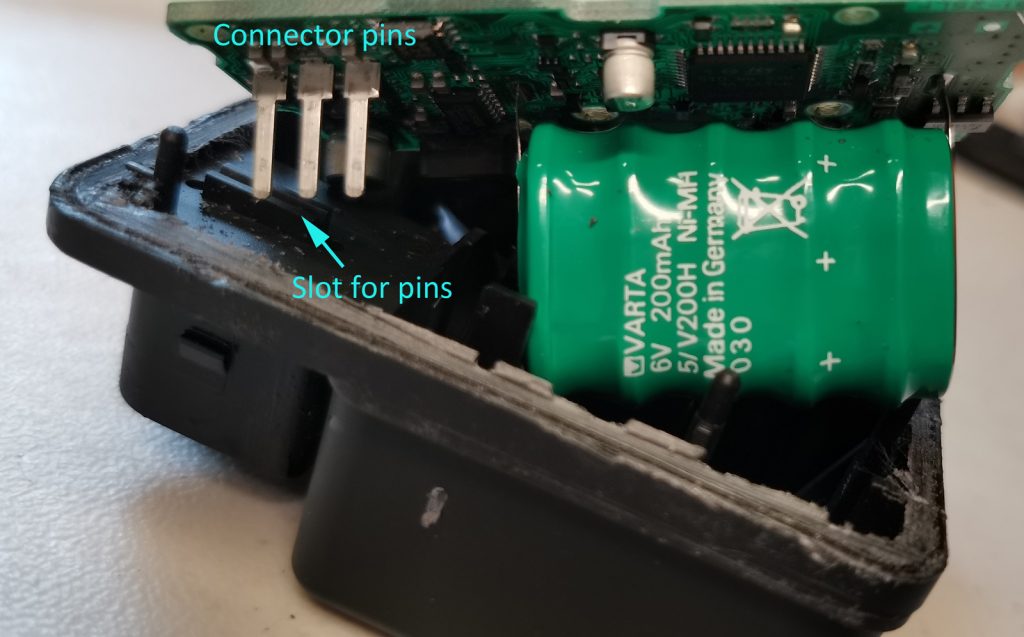
If the solder legs are long, use snips/side cutters to shorten.
The battery and board can then be pushed fully home so that the board is clipped back in.
Locate the wires back into their grooves and close the case with the other half. You will need to use glue/sealant or similar to attach and make a waterproof seal.
I went with epoxy (thin bead applied by cocktail stick around the adge and then clamped the case overnight). To be 100% sure that the case was waterproof, I then applied silicone sealant as well. You could possibly use something like self-amalgmating tape or butyl tape also, but I did not try and silicone is probably easier and safer.
Recent Comments